Monday, August 5, 2013

petticoat junction

I have had a mental block when it comes to executing the petticoat.  There is something quite foreign to me about trying to scoop out the front of skirt to ensure the hem lays parallel the ground. I am accustomed to be able to adjust the hem after the fact!

My futile desire for perfection has caused a great deal of procrastination.

That said- I finally decided to break down and create a petticoat out of muslin.  I wound up rebuilding the waist band twice.  The first time I pleated the fabric up- I found that it made odd bumps at the side of the hip.  Sloping the waist more gently rather than eliminating it to a direct point helped to eliminate this problem. I added a ruffle at the bottom for weight


  I initially thought that I could use this as an extra layer over my quilted petticoat for fullness. The reality is I am not likely to put a muslin skirt over a silk one. Still I am glad I made it because I learned a lot about the process without having to cut into a more expensive project.   


Sunday, August 4, 2013

Quilted Petticoat


I have made great progress on my quilted petticoat.  A quilted petticoat helps to hide the hoop ridges made by the Panniers/Pocket hoops.  As an added bonus- it will help to keep me warm (probably too warm).  I have to remember that Carnevale is in Febuary and likely I will spend the whole time vacillating from freezing outdoors to sweltering indoors.

The Fabric:

Many months ago in the garment district I saw this embroidered gold scroll scroll quilted dupioni. I knew right away that is what I would use to for my petticoat but as I was in the very initial stages of researching- It was not the time to buy.  At the time I didn't have even a clue as to how much I would need and at 35$ a yard- I didnt want to get the wrong amount. I had a minor heart attack when I went back (months later) and could not find the bolt. Luckily I had photographed it and the salesman knew where it had been stored away. Had it been sold- It would not have been the first time that I have missed out on a stellar piece of fabric because I was unable to make a decision when I saw it.

Anyway- here is my fabric:


Along with my fabric I bought a 1/2 a yard of the closest matching silk dupioni I could find.  This is to add to the top of the skirt so I don't have to pleat the quilting into the waistband. Despite having 34,623 colors to choose from- they did not have a matching so I went with one slightly lighter.

When I got home I found that the slightly lighter dupioni really bothered me so I decided to take the risk and try to dye it ....in Luca's fancy coffee.  (it was all we had!)  I used the anything but scientific method of boiling 6 espresso's mixed with a wine glass full of water. I tested a swatch and it seemed to work. In goes the actual yardage- fingers crossed.  BAM! The fabric came out great  albeit as silk does it lost its crunchy hand when wet. I am ecstatic over the results and more than a little proud of myself (even if the results should really be attributed to luck over any skill on my part.)

I didnt have a big enough pot or enough coffee
fabric on top is original. In the middle is after dying and on the bottom is the embroidered quilting.

Construction: 

Unlike some store bought quilted fabrics which have fashion fabric on both sides-  this one is dupioni on front, polyester batting and a fusible web/stiffener on back.  It makes sense that they created the fabric this way because it would be a waste to use silk on the back of what likely to be a home decorating fabric. The unfinished back meant a lot more work for me though.

Not only do I hate seeing things unfinished but I also was afraid this would be scratchy/uncomfortable on my legs so I decided to back the quilting.    When I initially sewed the quilting, skirt yoke and cotton muslin backing together I found that the stiffness of the quilting and embroidery left odd bumps at the top of the skirt.  I unstitched the yoke and by hand removed all of the embroidery in the seam allowance. I then pulled as much batting as possible from the top of the quilting to make it as thin as possible.  It took much longer and was much messier than I expected- but it worked.  

The quilted petticoat ties on in the standard way of 18th century petticoats.  All of my petticoats are being made with temporary ties which I will replace later.  

I hemmed the petticoat pretty short because I need to be able to wear it under both evening and walking skirts.  It is hemmed by hand with the fabric backing slip stitched to the hem for a clean interior.


Pocket hoops


I have finally completed my Panniers- twice. 


SET 1 (½) :

After reading so many blog posts about proportions and petticoats- I decided to undo the progress I had made on the initial set to make the pannier 3 inches larger.

The problem is that making the hoops larger made them very flimsy.  These were probably at the size that they needed to be a pannier instead of pocket hoops.  Making it even more difficult is that I was trying to achieve the pocket hoop look while only using the skeleton (bones) and no fabric.  This was strictly an aesthetic decision as I am likely to take a few photos in my unmentionables and find that pocket hoops are ugly.

I was finally able to make this shape work by adding a reverse hoop that help the largest and middle hoops out.  Supporting braces- much like a bridge- held the end of the hoop to the waistband while still leaving space to utilize the (yet to be made) pocket underneath.

These hoops worked.  That in and of itself is a feat!  However-  when I draped fabric over them (I hadn’t made a petticoat yet) I found that I just did not LIKE them.  I know that at carnavale bigger is better- I just could not get used to the proportions.  They seemed  comical, contrived and costume-y.  Three things I do not want.


This set back completely halted my progress and for about a week I hemmed and hawed over IF I should make a new set (So much work went into this pair!)  I could not make a petticoat until my hoops were confirmed and this (and my inability to make a decision) greatly stalled my progress. 
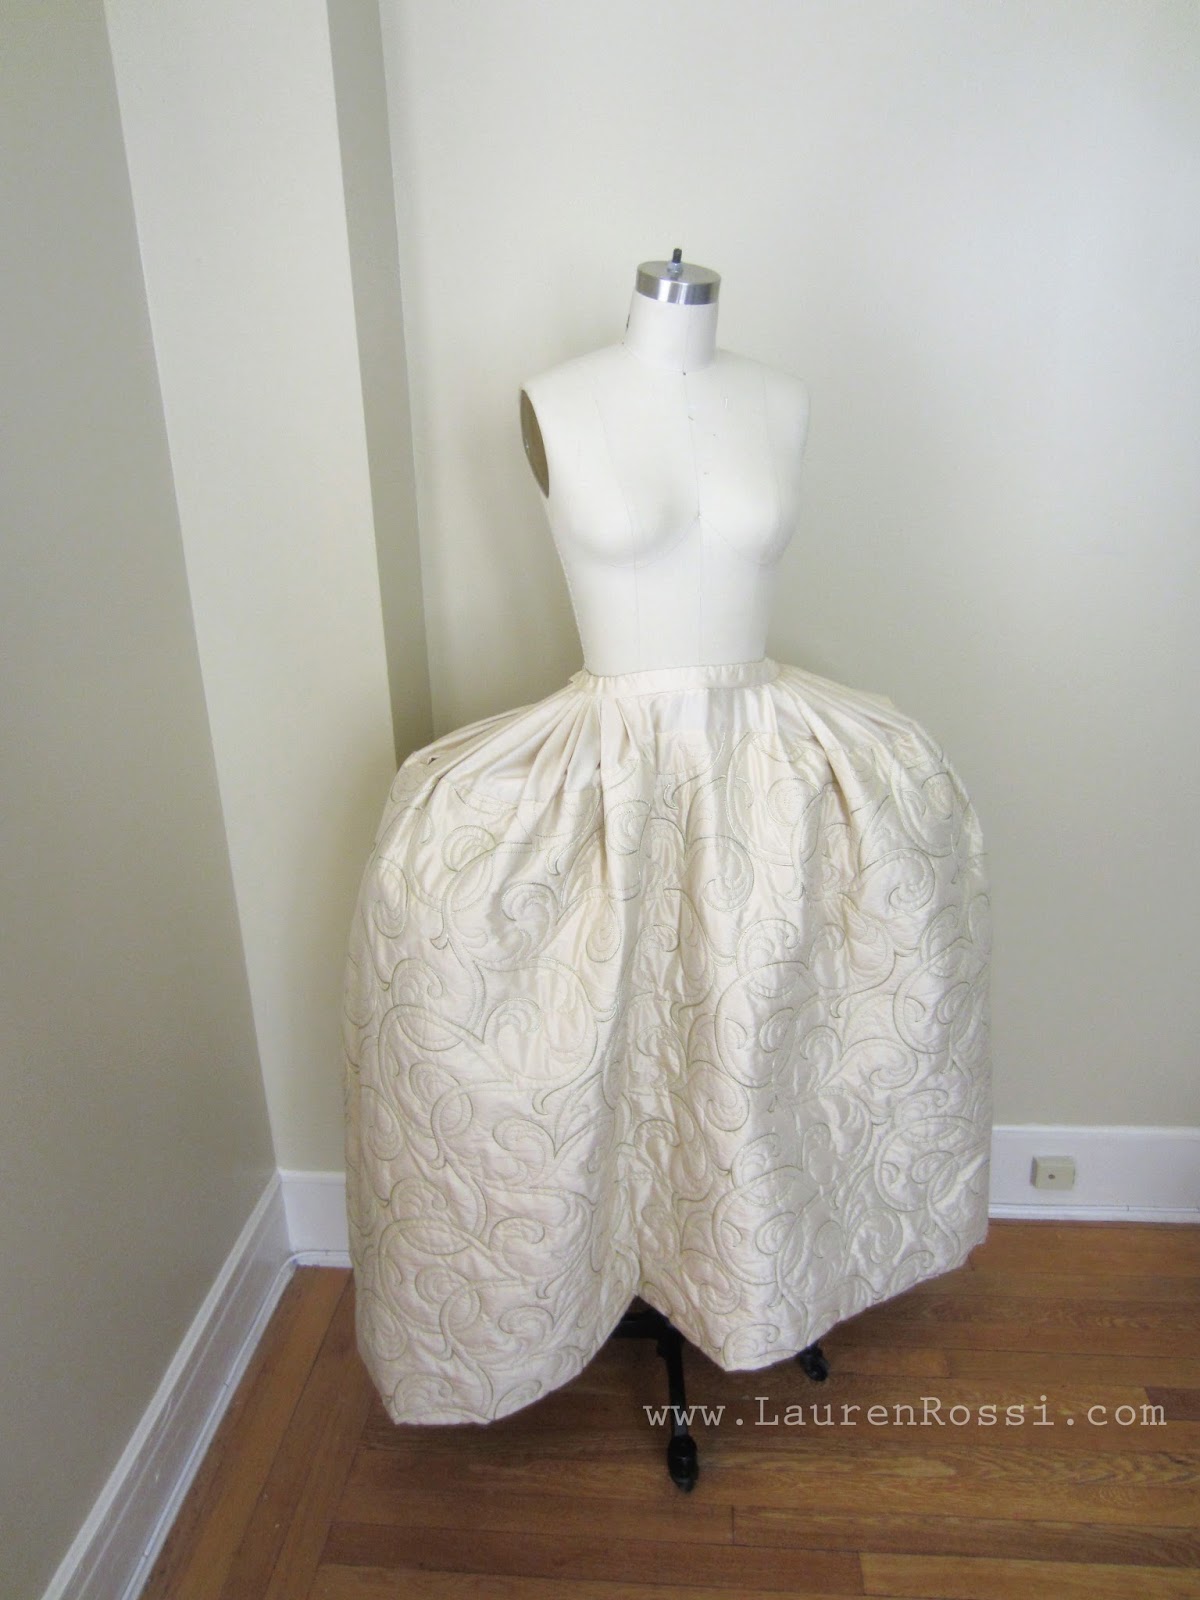
Set 2.

Of course I decided to remake the hoops- slightly smaller this time. I took each hoop down by 3” and am much much happier with the result.   The slightly smaller hoops mean that I no longer need the reverse hoop (which worked but I did not like).

As I have dropped the top Hoop off from the waist- I still need the supporting pieces however these actually add to the architectural feel of the piece.

I also have tested to see if the waistband will fit under my stays like I want - and it does! 


Finally I have no excuse to not move on to my petticoat (except my own procrastination)
The focus that i spoke so excitedly about in my last post has sadly eluded me for a little bit.  A large part of this is because during this time- I moved!   Not far- just to another apartment- but as anyone who has tried to move in the city knows- it is exhausting.  Our new place is much nicer, larger (relative for nyc) and closer to the garment district however we have zero pieces of furniture. Not even a chair to sit on.

As a result- I have to sew while sitting on the floor with my machine infront of me. Awkward to say the least


It reminds me of freshman year of college when I made an Elizabethan gown on the floor of my dorm.  Only unlike college - this kills my back now and makes it very hard to work for more than a few hours in a row. Old age! 


I am definitely looking for a table right away